In part 1 of this series, I setup an environment where a Python application running on a Raspberry Pi, collected temperature, humidity and soil moisture data from connected barometer and moisture sensors. This data was published to an MQTT message broker then retrieved by an application hosted on IBM Bluemix. This application stored the data in a Cloudant database for later visualization via an HTML5 application.
There are many different types of MQTT brokers available given it is an open source protocol. These brokers vary by feature sets provided, some of which are in addition to the standard MQTT functionality. IBM’s IoT Foundation, now known as Watson IoT Platform, serves as an managed and secure MQTT broker and much more. With the Watson IoT Platform, you have a fully managed IoT platform allowing secure connection of devices with further access to a scalable platform as a service environment and a plethora of other services such as storage and analytics.
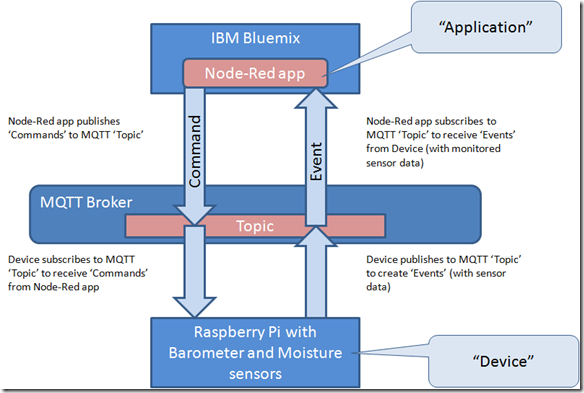
The diagram below provides a simple depiction of the interactions between a ‘Device’ and ‘Application’ through an MQTT Broker. In part 1, I used an open source MQTT Broker. In part 2, I will be using IBM Watson IoT platform as the MQTT Broker. In my environment, I am only publishing ‘Events’ to the MQTT Broker for action by the Node-Red app. I am not currently publishing ‘Commands’ back to the Raspberry Pi device.
My goal then for this next step in the series is to modify the Poseidon Client (Python application running on Raspberry Pi) to publish events to Watson IoT Platform and change the application running on Bluemix to receive that published data from the new source. In this entry, I will outline the changes to each of these applications.
Before making any application modifications, I first need to configure the Pi to connect to the Watson IoT Platform using this recipe. At a high level, this recipe had me do the following:
- Download, install and start the IoT service which would manage the connection and publish events to the IBM IoT Foundation Quickstart.
- Register my Raspberry Pi device in Watson IoT Platform following another recipe.
- Use the credentials provided by the registration process to connect the device to Watson IoT.
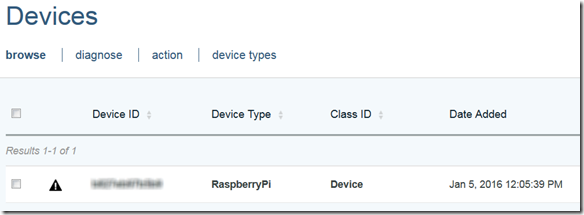
When complete, I had a device registered with the IBM Watson IoT Platform as shown below. In the process I was provided a device ID and authentication token, to be used later when connecting the device to the Watson IoT Platform service.
Now I am set to modify the application code to publish events directly to Watson IoT Platform using the IoT service now running on my Raspberry Pi. I will keep the existing code that is using the paho MQTT client libraries to publish to an open source MQTT broker. This code is gated by a configuration parameter that I will just turn off so it no longer executes. I will add new code and configuration parameters to use the Watson IoT Platform Device API to publish events to the Watson IoT Platform.
The config.py file contains a number of configuration parameters for the Poseidon Client. Set ‘sendToCloud’ to ‘False’ in order to turn off sending data through the open source MQTT broker. Add a new ‘sendToIoTF’ parameter and set it to ‘True’ to publish via the Watson IoT Platform.
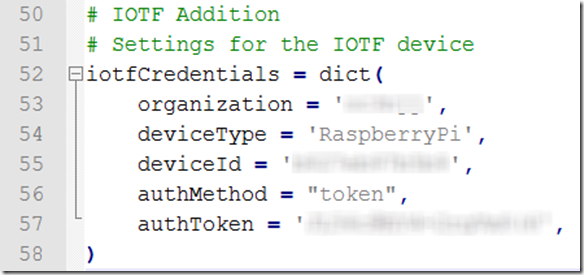
In the config.py file add a parameter to capture the credentials used to connect to the Raspberry Pi device I registered earlier.
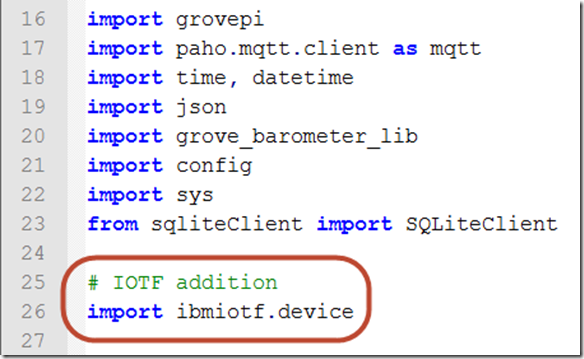
In the PoseidonClient.py code add the requisite import statement to utilize the Watson IoT Platform Device API.
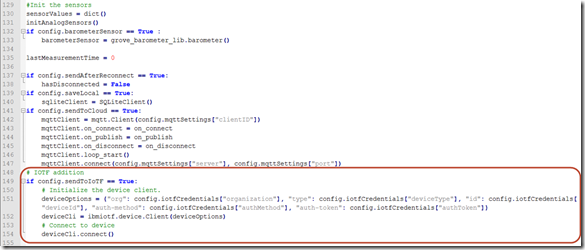
Skip ahead in PoseidonClient.py to the section of code that initializes the sensors and device interfaces. The new code below creates a device client instance using the credentials added to confg.py then connects to it.
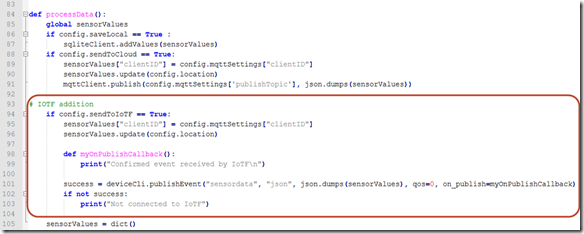
Go back in PoseidonClient.py to the processData code and a publishEvent call (with appropriate callback) to send the sensor data to the Waston IoT Platform to be read later by the application running in Bluemix.
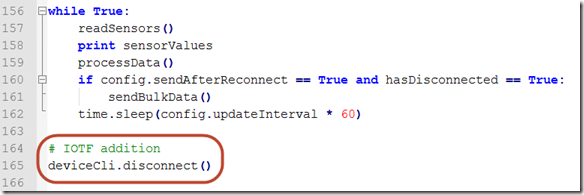
At the end of the main processing loop, add a call to disconnect from the device client instance.
Now we move on to the application in Bluemix. Here is how it looked at the end of part 1.
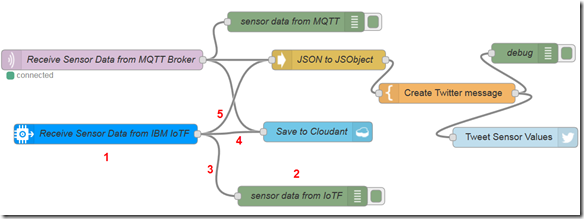
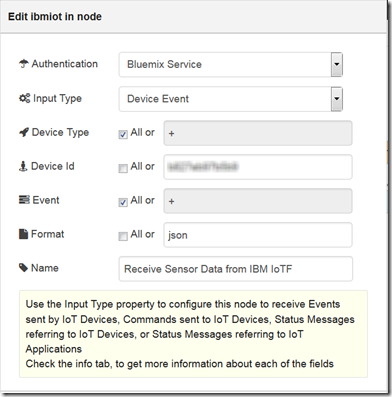
Use the Node-Red editor to add the following nodes and connections.
- Add an ibmiot input node and configure it to read events published by the Raspberry Pi device (see subsequent screen capture with showing the parameters for the node)
- Add a debug node to capture the data received from the device
- Connect the ibmiot input node to the debug node
- Connect the ibmiot input node to the existing Cloudant output storage node
- Connect the ibmiot input node to the existing json function node to transform the sensor data payload from json format to Javascript object.
This screen capture illustrates the parameter settings for the new ibmiot input node.
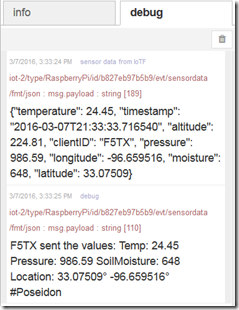
After making the above changes, running the PoseideonClient on the device and the Node-Red app in Bluemix caused the following debug output in the Node-Red debug console.
The first debug output is the sensor data coming in from the Watson IoT Platform. The next debug output is the formatted message being sent to Twitter.
Nothing changed in the Cloudant queries and views nor the HTML5 app. From part 1 of this series, these will produce a visualization similar to the following:
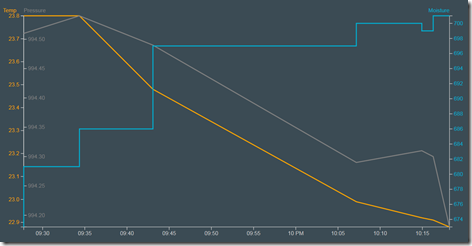
I have successfully altered the device to publish events to the managed IBM Watson IoT platform MQTT Broker and the Node-Red app in Bluemix to receive and process those events. Next up for me is to investigate possible inclusion of the IBM IoT Real-Time Insights service on Bluemix or perhaps Watson Analytics. Another area of interest is the currently experimental IBM IoT Workbench.

